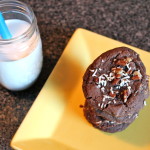
Makes 6-12 dark chocolate coconut scones (depends on what size you slice them into)
Ingredients:
3/4 cup plus 1 tbsp Cold heavy cream
1 large Egg
2 cups All-purpose flour (be exact here) plus more for work surface
1/4 cup Granulated sugar
2 tsp Baking powder
1/2 tsp Fine salt
6 tbsp (3/4 stick) Cold unsalted butter, cut into small pieces
1/2 cup Dark Chocolate
1/2 cup Sweetened Coconut flakes
Sanding sugar (optional)
Method:
- Preheat oven to 400 degrees and line one baking sheet with parchment paper.
- In a medium sized bowl, whisk together 3/4 cup cream and egg.
- In a large bowl, whisk together flour, granulated sugar, baking powder, and salt.
- With a pastry blender or two knives, cut butter into flour mixture until it resembles coarse meal, with a few pea-size pieces of butter remaining. Stir in dark chocolate and sweetened coconut flakes.
- With a fork, stir in cream/egg mixture until just combined. (The dough should be crumbly; do not overwork.) I work the dough until all ingredients are combined , usually 1 minute and then stop so that the scone is the right texture when finished baking.
- Transfer dough to a lightly floured work surface and pat into a 6-inch circle (you can make a bigger circle, however you will have to adjust baking time to account for thinner scones. Cut into 6 wedges and transfer to a parchment-lined baking sheet. Brush tops with 1 tablespoon cream and sprinkle with sanding sugar, if desired.
- Bake until golden, 16 to 18 minutes (less time if you made smaller/thinner scones), rotating sheet halfway through.
- Serve by themselves or with a light layer of butter or jam. Enjoy!


